Neoprene and Latex masks are efficient and durable, and pretty easy to make. We used them for the royalty and upper class in Caucasian Chalk Circle.
- Materials
- Step 1 – Model Mask
- Step 2 – Secure Matrix
- Step 3 – Mix Plaster
- Step 4 – Spray Clay with Oil Soap
- Step 5 – Pour Plaster over Positive
- Step 6 – Remove Mold
- Step 7 – Pour Latex
- Step 8 – Let Mask Set
- Step 9 – Remove Excess Latex
- Final Steps
Materials
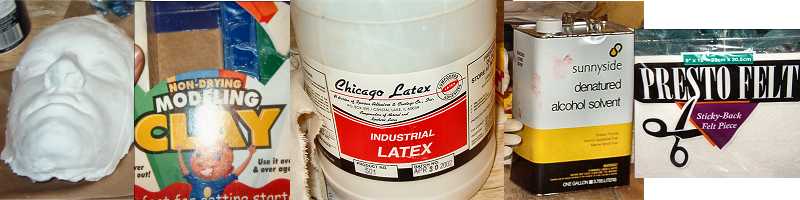 |
Step 1 – Model Mask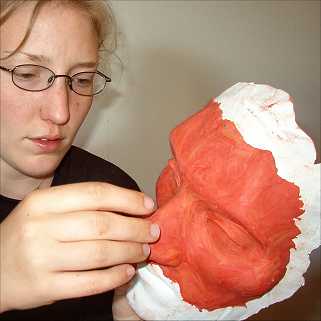 Using the modeling clay, build on the plaster positive what you want the mask to look like. By using the plaster positive, you will be assured that the mask will fit the bone structure of the specific person very nicely – Note, however, that the latex or neoprene material shrinks as it dries, so take care to make the features a little bigger than you anticipate |
Step 2 – Secure Matrix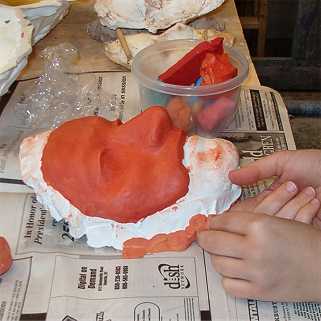 Find a spot where you can be messy and lay out some newspaper.Use the modeling clay to secure the matrix to the ground (table, whatever), but sure to fill in any potential undercuts
|
Step 3 – Mix Plaster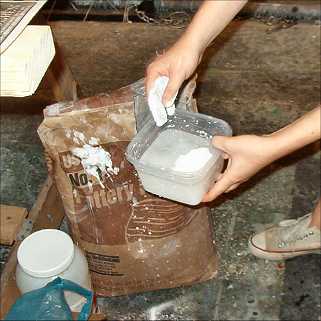 – Start mixing up some plaster in a container – Start with room temperature water in a small bucket or container, you don’t need a lot of water at all, maybe an inch up from the bottom. – Start sifting the plaster into the water. DON’T MIX IT YET! Keep pouring in plaster, making sure you pour it all around the interior of the bucket, not just one spot. – When the plaster starts to sit on top of the water, and almost all the water is covered up by plaster, you may mix. Squish it up with your hands, making sure to squeeze out all the lumps (after you’ve started mixing, don’t add any more water. If you don’t have enough, you can always make another batch) |
Step 4 – Spray Clay with Oil Soap
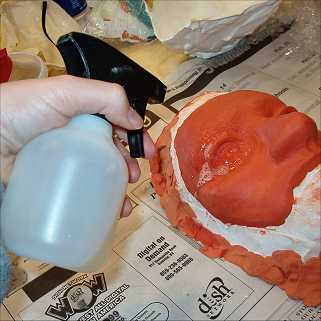
– Before you put the plaster on, spray the positive with Murphey’s oil soap. Douse it pretty good, especially the plaster part, to make taking the mold off later a bit easier.
– Wait for the plaster to get to a creamy consistency before you put it on (to prevent drip marks in the mold)
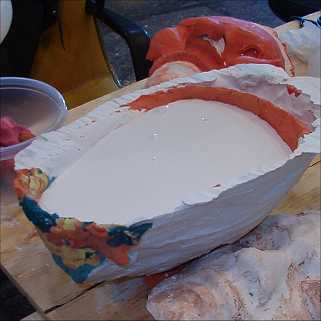
Step 5 – Pour Plaster over Positive
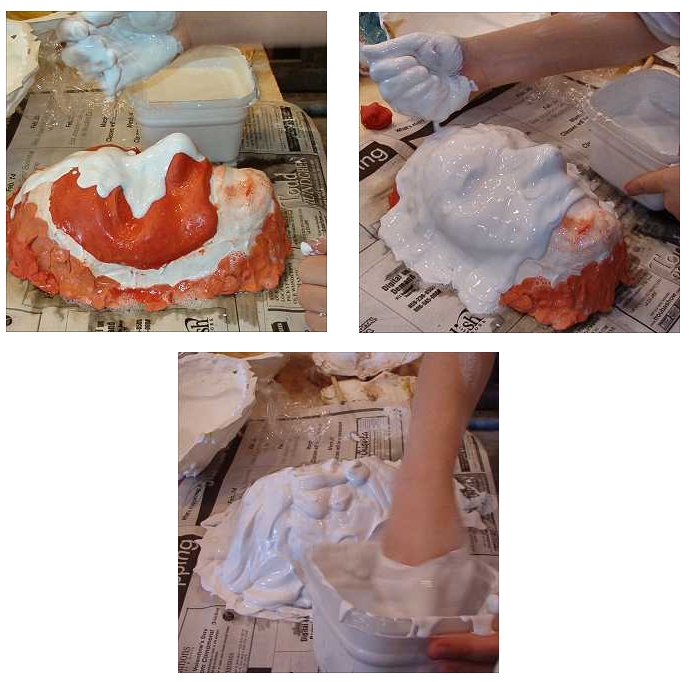
– Start dripping the plaster over the positive
– Make sure you cover all of the places where you have modeling clay
– Leave the area around the chin clear, this will help you have a place to start prying when you have to take it apart later
– As the plaster starts to thicken, layer it up so that you have a large, dome-ish form all the way around your positive.
Step 6 – Remove Mold
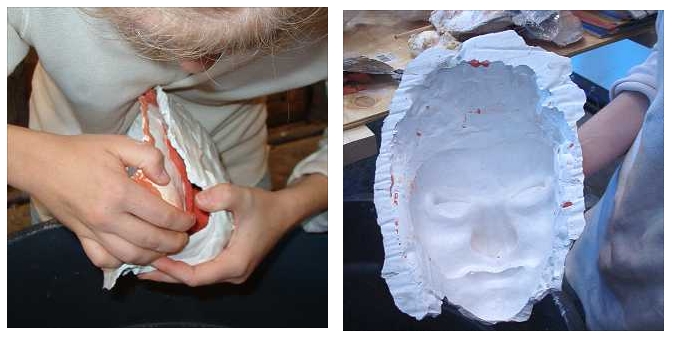
– Give the plaster an hour or two to set up, it needs to be very strong for when you take it apart, so it won’t break
– Using the chin area as a grip, begin to pry the mold away from the positive, remove excess modeling clay to help
– This part takes some muscle, just be patient 🙂
– When you get the mold off, remove any modeling clay stuck on the inside.
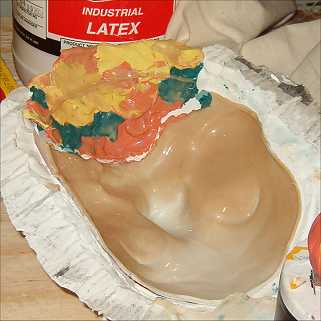
Step 7 – Pour Latex
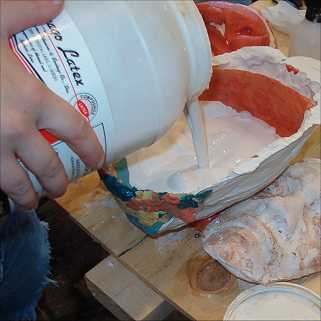
– Use modeling clay to secure the mold to the table, and to plug up any areas where the latex/neoprene may run out
– Pour latex/neoprene into the mold, make sure all the areas where you want to have the mask are covered.
Step 8 – Let Mask Set
– Now wait for the latex/neoprene to dry. The plaster from the mold soaks the moisture out of the latex/neoprene, so it dries right against the mold. There will still be a pool of liquid material where it is not touching the plaster
– The longer you wait, the thicker the mask will be. Our estimation is about 2 hours for a mask that’s roughly 1/2 centimeter thick
Step 9 – Remove Excess Latex
– After you’re finished waiting, pour the excess liquid latex/neoprene back into its container, where it can be used later
– You may need to wait a little longer for the mask to finish drying in the mold.
Final Steps– After the mask is dry, you may use an exacto knife to trim away excess material, and to cut out eye and nostril holes – Use the alcohol solvent to buff away any flakey areas to get the mask surface smooth – Afterwards, you may add straps and padding for comfort, then paint or add to your mask as you see fit, yay! 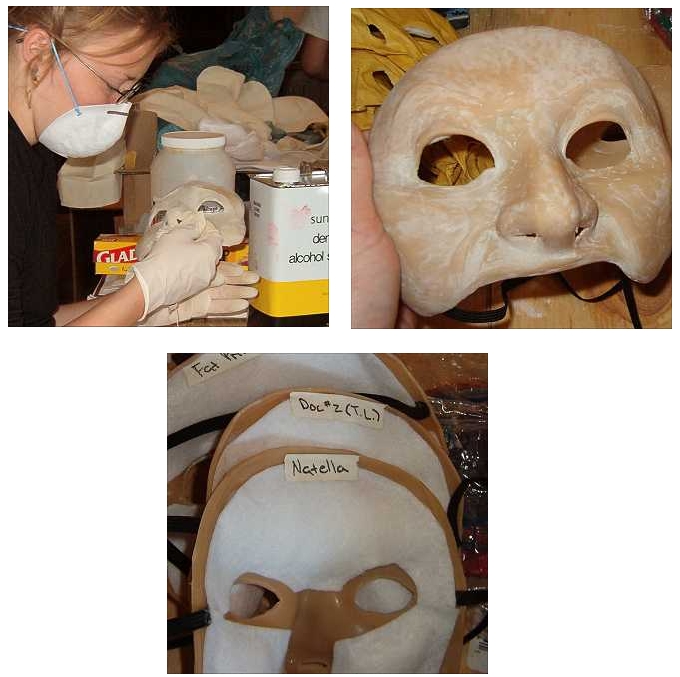 |